Adding the Social Pane to Custom Entity Forms in Microsoft D365 Online
The Social Pane in Microsoft Dynamics CRM enables users to work with Posts, Activities and Notes directly from the form of an entity. In this blog I will describe the steps for adding the Social Pane to a custom entity form.

Step – 1 Customise the Entity
To record Activities and Notes against an entity either or both the Activities and Notes options, under Communication & Collaboration when customising the entity, must be selected.
With the Activities option enabled users may access, schedule and complete Activities for the entity from the Microsoft Dynamics CRM Activities, from the entity’s form Related Records area and from the Social Pane if present on the form.
Step 2 – Refresh Post Configurations

Step 3 – Configure Post Configurations
To record Posts against an entity, using Activity Feeds, you will need to navigate to SETTINGS, Post Configurations and ensure that the Post Configuration entry for the entity is activated and the Wall Enabled option is selected.

There is no need to publish changes to the entity. This is only required for upgraded forms where a What’s Newtab is added to the form instead of a Social Pane. Selecting or unselecting the Wall Enabled option will cause the POSTS tab to be displayed or not displayed on the Social Pane for the entity.
Step 4 – Customise the Form
The Social Pane cannot be added to a form that has been upgraded from Microsoft Dynamics CRM. You will need to create a new form. By default the new form will usually be a copy of the upgraded form, so creating a new form does not require re-customisation, however you should check and test your customisations; especially with respect to programming that may refer to the form by name.
If you add the Social Pane to the upgraded form only the NOTES tab will be displayed regardless of whether or not the Default tab for the Social Pane is set to Activities, Posts or Notes.
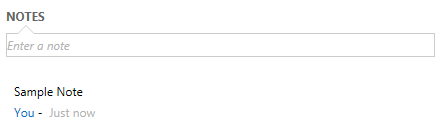

If you add the Social Pane to the new form then the POSTS, ACTIVITIES and NOTES tabs will be displayed.
If required, add the Social Pane to the new form for the entity by adding or selecting a Section and then select INSERT, Notes. If the Notes control is disabled it is most likely because it has already been added.
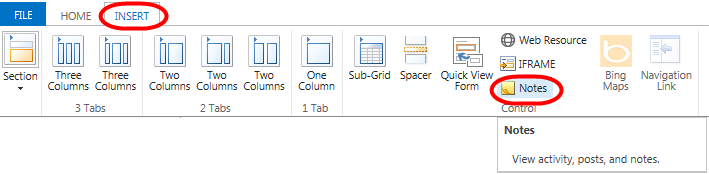
For Tabs that contain multiple columns I recommend using one of the tab layout formats that contain a wide column, such as those highlighted in the following images, and then add the Social Pane to a section within the wide column.


The following Section properties are recommended. There is no need to display the Label.

The following Notes properties are recommended, however you may choose to select which tab is selected by default. There is no need to display the Label. Leaving the Number of Rows, under Row Layout, set to 15 is recommended for optimally displaying the Social Pane on the screen.


If you select the Activities and/or Notes options when creating a new entity in Microsoft Dynamics CRM then the Social Pane will be added by default to the Information form for the new entity.

No comments:
Post a Comment